Sunday 28 June 2015

New nail art discovery: Using gel polish for a super quick way to add detail to nails!!


Hiya guys!  Hope you are all doing great!
 
This week I thought I would do another wee nail art post as I’ve not done one in a while.  This design is a little bit different because I used gel nail polish for the nail art instead of just regular nail polish!
 
I have to say gel nail polish is super easy to use for designs!  As gel polish is thicker than regular polish and doesn’t air dry (because it is designed to be dried with a UV/LED lamp), you can take your time when creating the design on your nail.  And the fact that each nail dries in 30 seconds - 1 minute, ideal!
 
I bought this little starter kit a couple weeks ago because I wanted to try the gel nail polish and see what the fuss was about, as everyone talks about it, you know?  I’ve only tried it out once on my natural nails…it didn’t go very well.  However, this was only because I was and still am new to the gel polish!  I just need to practice!   

So I gave it another go and this is how it ended up… 


Quite cool, eh?  
 
So, like my usual nail art posts, I will explain the steps I took to create the look!


What I used: 
 

·        False nails (Yes, you can used them on these too…which is fab!!) 

·        Practice hand (You don’t need this if you are using false nails - just stick them to a flat surface with Blu Tack or to the back of sticky tape!) 

·        Gel polish starter kit


·        Pale pink regular nail polish - as the starter kit only has one colour I used regular polish for the base coat 
 
·        Dotting tool


·        Small 10/0 paint brush


·        Nail file, to file rough edges of the nail


Steps:
 
 
1.     Started off by picking the size of nails, suitable for myself, and stuck them to my practice hand with some sticky tack.


2.     Next I applied the base coat of pale pink and waited for a few minutes until this was completely dry.


3.     Once all the nails were dry, I started the designs one nail at a time then cured the polish under the LED lamp.


·        Basically, all I did for the designs was to put a blob of polish into a small art palette and use my dotting tool to put a blob onto the nail, and then the small brush for detailing.
 
·        To be honest, I got idea for the leafy designs from latte/coffee art (I know, I’m a wee bit strange.  But you know, you can find inspiration from anywhere!)
 
 
4.     Lastly I applied a fast drying top coat!  Although a top coat isn’t necessary with gel polish, I wanted a bit of glossiness to my nail!


So there you go!  A super quick and easy way to do nail art!


Okay guys, thank you SO SO much for reading!  I really hope you enjoyed this post J and I will catch you all next time!
 
As always, have a fab week and take care! Xxx


Sunday 21 June 2015

Crafty DIY Gift: Watercolour Bookmark!!


Hiya guys!  Happy Sunday and to all you pops out there...


For this week’s post I thought I’d blog about what I made my lovely pops for Father’s Day!  I wanted to make a gift instead of buying one, like I did for mama for Mother’s Day.  So, I made something that he would use…a bookmark!
 
Like myself, my dad prefers actual books to eBooks and Kindles etc. so obviously a bookmark would be useful.
 
As I mentioned in my previous post, I had a wee shopping day last week and got a good haul of art supplies…so, I thought I’d make use of one of the things that I bought!  And this was a good wee crafty project for it as my dad loves painting, so it was a good way of incorporating the artiness into the making of the bookmark!


What I used:
 
 
·         Watercolour paper (cut to 18cm by 4cm)


·         Paint brush
·         Cup of water
·         Aqua markers


·         Masking tape
·         Gold sticky back paper
·         Stamp and ink set


Bookmark idea!
 
 
I was trying out the aqua markers to see how they work and what I could do with them, and this was one of the ideas.  Kind of like when you have a hand written piece of paper and it gets soaked/splashed with water and the ink goes a bit blotty.


I decided to put extra water on the paper and hold the paper vertical so the water would run down the page, picking up some of the colour pigment along the way.  It turned out quite cool, actually!


The Bookmarks!
 
 
DIY Bookmark set #1!
I added a gold accent to the watercolour design


DIY Bookmark set #2!
Using masking tape to create a straight clean edge between the paper and the colour!


DIY Bookmark #3!
Using the stamp and ink set to write out a quote about reading! 


I intentionally only meant to make one bookmark but I got a wee bit carried away and ended up with loads!


However, this is not a bad thing as my dad has a few books on the go at any one time!!
 
Anyway guys, thank you SO SO much for reading!  I really hope you enjoyed this post J and I will catch you all next time!
 
As always, have a fab week and take care! Xxx


Sunday 14 June 2015

3 super cool DIY craft ideas using Duck Tape!!


Hiya guys!  Happy Sunday!  Hope you’ve all had a fab week!
 
I’ve had an equally chilled and busy week!  Had a good couple of days off where I managed to go out into town for a wee shopping trip with the sister…and the weather was lovely too, which was a bonus.  So we had a good stroll in the sun!
 
While we were in town we discovered this new art store - yaaass!  So, obviously we had to go in to have a wee nosy!  And I have to say it has waaaay more arty stuff than I have seen in any other art store I’ve been in!  It’s amazing!!!  My new favourite place for definite!
 
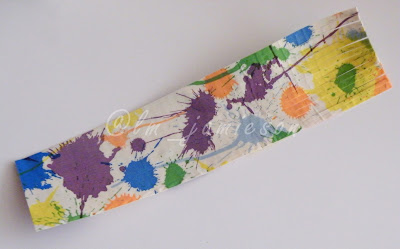
Anyway, as usual I over-buy when I go into a shop like that - I just can’t help myself.  So, I got a good haul of art supplies!  Including this fab colourful paint splat design duct tape by Duck.
 
I have seen a few Duck Tape crafts on pinterest some time ago and I thought it was pretty cool that folk were using the tape to make little crafty things!  Although, to be honest, it wasn’t one of those crafty projects that I had to rush out ASAP and get supplies and make some for myself.  However, when I saw them in this new art store, I thought  ‘Why not! I’m going to get a roll of tape and try it out!  See what I can make!’
 
As you probably have guessed by now, in this week’s post I’m going to be talking about what I made using the tape!
 
All I really needed for the following projects was:


·         Duck Tape.
·         A rotary cutter.
·         A ruler for a straight edge. 


Duck Tape crafty project #1:  Placemat and coaster!


I thought that this would be a cool idea for a nice summer placemat and coaster - a woven design idea with strips kept in place with a border of the tape.


For the placemat:
 
 
1.     Decide on a size for the mat, and figure out how many strips of tape will be needed.  In my case, it was 5 strips by 6 strips.
 
2.     Measure the size of one strip and make sure to double the length it as it will be folded over onto itself - sticky side to sticky side.  It’s a bit tricky to do this, but the key is to work very slowly and keep a steady hand.
 
3.     Once all the strips are made, start weaving them together (over and under, over and under), until the pattern looks like wee squares.


4.     Lastly, cut a small strip of the tape for the edges, to make a border to keep all the pieces in place.  If you need to, add a dot of glue in between the overlapping strips.


For the coaster:
 
 
Exactly the same as the placemat, only I cut the Duck Tape strip into thinner strips about 7mm wide.
 
1.     Decide on a size for the coaster.  In my case it was 10 strips by 10 strips.
 
2.     Measure the size of one strip and remember to double the length as it will be folded over onto itself.  Then mark 7mm along the short side of the strip (top and bottom) so that you can cut it into thin strips. The width of the tape is 49mm so, by cutting it into 7mm strips, you end up with 7 strips.  Do this two more times so you have enough strips for the coaster.
 
3.     Like the placemat, once all the strips are made, start weaving them together (over and under, over and under).
 
4.     Finish by taping the edges to keep all the pieces in place and using glue if you need to.   
 
 
Little coaster
 
 
Close up of the woven strips


Duck Tape crafty project #2:  Bookmark! 


I decided to make my bookmark 18cm in length so it is the right size for an average book.
 
 
1.     Just like the placemat and coaster, double the length of the tape and fold in half (sticky side to sticky side).
 
2.     Then, measure 5cm from the top and start cutting very thin strips down from the top, basically creating a fringe effect!
 
 
Fringe detail
 
 
Bookmark in use


Duck Tape crafty project #3:  Tassel key ring!


This idea stemmed from the bookmark fringe effect.  I thought it would be quite cool to make a tassel key ring!
 
 
1.     First, measure the size needed for the key ring, and just like the other two projects, double the length and fold the piece of tape in half to create the right size of material needed.  In my case, it was 15cm.
 
2.     Next, place the piece onto a cutting mat lengthways and measure 1cm from the top and, like the bookmark, cut very thin strips down from the top, all along the length until the end.
 
3.     After that, put a little bit of glue onto the key ring so that the tape won’t move when you start wrapping.  Then wind the tape around and around, adding little dots of glue every now and again, to secure it. 
 
4.     Once the tape is wound round, cut a small strip of tape to hold the top together.


Attachment to the keyring
 
 
The fringe detail
  
 
Added to the set of keys!


So you can see that you can use duct tape for loads of things other than fixing things!  Funky, eh? 
 
Anyway guys, thank you SO SO much for reading!  I really hope you enjoyed this post J and I will catch you all next time!
 
As always, have a fab week and take care! Xxx